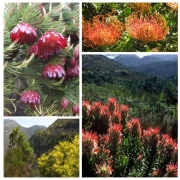
PROTEACEAE
Which include Banksias, Dryandras, Proteas, Leucadendrons, Leucospermums, Mimetes, Serrurias, Paranomus, Telopea
These plants should be sown in AUTUMN when the difference between day and night temperatures is about 12°C . The same conditions may be found in spring, when day temperatures are over 22°C and night temperatures are below 10°C . This is important, as PROTEACEAE will not germinate without this temperature difference.
Treatment:
You will need to “smoke” the seeds before you plant them as well as doing a pre-treatment with a fungicide.
Homemade Smoke Treatment for Seeds
Enclosure for smoking: Metal frame, cement floor, large sheet of thick transparent plastic with sand on the outside to seal the edges. Size for approx 16 large seed trays or approx 50 small trays 3m x 1m x 0.65m high.
Sow the seed on top of soil mix. Leave small seed uncovered. Cover other seed with a thin layer of milled bark – just cover the seed. Do not water.
Place the seed tray in the frame, cover with the plastic sheet and make airtight.
Through an opening at one of the sides pump smoke produced from burning a mixture of mainly dry grass, a few twigs of indigenous shrubs, dry Passerina twigs and leaves, and once this is burning well, add a handful of fresh Passerina twigs. The smoke should fill the enclosure in 5-10 minutes, and should be dense.
A bee smoker also works very well for this. Seal the crate with a plastic bag and pump it full of smoke.
Seal the enclosure and leave for 2-3 hours, after which the smoke should have disappeared.
Take the seed trays out. Water immediately. Seed should be kept quite moist at all times. Germination to be expected after 3-4 weeks.

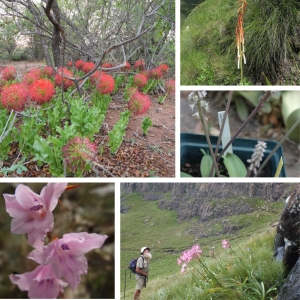
Neville Brown and colleagues “smoking” seeds.
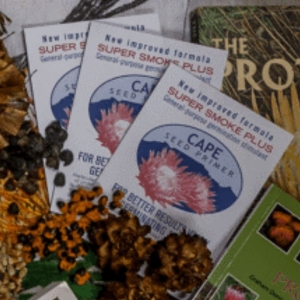
Smoke Primer
Pre-sowing fungicide treatment
Pre-sowing treatment of some PROTEACEAE increases their germination percentage considerably and decreases the losses due to fungus infections. If you have problems with seedlings damping off, then we recommend a pre-emergence fungicide called Apron XL (https://www.syngenta-us.com/seed-treatment/apron-xl)
Planting
Sow seed immediately after treatment in seed trays or beds. Use a well-drained acidic medium with a pH of about 5.5. This should consist of 2 parts peat or decomposed pine needles, 2 parts coarse river sand (NOT builder’s sand or sea sand), and 1 part perlite or polystyrene pellets. If possible, the sowing medium should be sterilised – this will decrease the chances of fungus infections. Place seeds approximately 2cm apart and cover with a thin layer of clean river sand. Keep seed trays in semi-shade, and protect against mice, birds, squirrels etc. by covering with shade net or wire mesh. Water with a fine rose or spray and do not allow the seed trays to dry out at any time.
DO NOT germinate PROTEACEAE in hot houses, with bottom heat or under glass.
“I would not recommend using only pumice – it is very much similar to perlite. You will definitely need some form of organic material like peat to hold onto moisture and nutrients” – Arnelia Farms
Protea:
Soak seed in hot water at exactly 50°C for 30 minutes. Spread out to dry and dust lightly with fungicide such as Thiram.
“I have also germinated them between damp hessian although you need to remove the young germinated seed soon after germination before the roots grow into the hessian, otherwise the roots are damaged when removed from hessian”
Nut Leucadendrons, Leucospermums and Paranomus:
Germination of nut seeded Leucadendrons and Leucospermums requires different treatment to assist germination. Both have hard seed coats that serve to protect the seed until fire removes the overstory vegetation. During the intervening period the seeds lie dormant in the soil and the acidic moisture slowly erodes the hard seed coat and ultimately allows oxygen and moisture to penetrate the seed coat which results in germination. The occurrence of fire also plays a role in that the fynbos vegetation burns quickly and subjects the seeds to a short period of heat followed by cooling, enhancing germination. To get good germination with the nut seeded species you need to mimic this process.
Leucospermums are special in that in addition to the hard nut-like seed coat it has an impervious, skin-like outer seed coat that cuts down oxygen supply to the embryo. It also has a waxy oil rich protein body at one end of the seed called an elaiosome. This elaisome attracts ants, which act as dispersal agents taking the seed into their underground nests where they are protected from rodents. The ants eat the elaisome and damage the outer seed coat, while time results in the nut seed coat eroding in the acidic soil. Fire in the fynbos then burns away the vegetation and exposes the underground seed to a short burst of heat. Fires in fynbos normally take place at the end of summer so seeds germinate after the fire when the night temperatures are cooler and with the onset of the first seasonal rains.
The hard nut seed coat also restricts supply of oxygen to the embryo slowing down germination. So, it is important to treat the seeds with a 1% solution of hydrogen peroxide (available from chemists) for 24 hours to scarify the seed coat and remove the waxy outer seed coat. If the waxy coat is still in place after this, then rub it off with your fingers. Another way to scarify the seed coat is to lightly rub with sandpaper before sowing. I prefer to sow Leucospermums and nut seeded Leucadendrons on well-drained soil mix rather than between hessian. There is less chance of root damage or disease developing in sandy mix than in the wet hessian.
Germination time can be decreased by soaking seeds in a 1:2 solution of hydrogen peroxide (available from chemists as Hydrogen peroxide 10 vols) in water immediately before sowing.
“Years ago, I worked at the Regional Services Council nursery in Hout Bay. They germinated Leucospermums in the thousands by simply mixing the seed in sand and placing on a shovel over an open fire for a few minutes. After warming up the sand and seed they threw the shovel full into cold water. This no doubt mimicked the heat pulse that happens in nature. There germination was fantastic and quick.” Anthony Hitchcock
Serruria:
Serruria florida is very sensitive to soil conditions (pH, drainage, water quality CEC and nutrient levels) and if you get this wrong then they will struggle. Poor, acidic, quartzitic based, well drained, soils is what is recommended. Make sure the media is clean as possible. Good sharp river sand mixed about 50:50 with good quality washed peat or similar product. Decomposed pine needle compost is also good. You can sterilize the medium with hot water or stream. In Mediterranean climates the seed should be sown in late summer to early autumn whereas other climates probably the beginning of their growing season, i.e. spring. Pre-emergence fungicide treatment is important to maximize protection from pathogens in the soil and further protection post germination. Apron XL from Syngenta is good for this purpose and for any susceptible seeds such as Cyclopia. Serruria seeds are hairy so put the seed in a packet with a bit of Apron XL and shake so the seed is covered with a dusting of powder. NB. Read the safety precautions because it is not good to breath in these products. Once dusted, sow the seed in a medium of well drained, sharp river sand mixed with decomposed pine needle compost or good quality washed peat. Seed should not be sown too deep, i.e. not more than 1cm. Place in a warm, well-lit and aerated position and keep watered, but not soggy.
Often lack of germination is because the seed gets infected by fungus as it germinates and before it emerges from the soil. Grow them in a well-lit, well ventilated area under cover of polycarbonate or similar so that their water application and moisture levels can be controlled. Overwatering on the leaves can result in fungal damage if the leaves stay wet for a period of time. For a grower with time available we recommend watering from below or around the base of the plant to keep the foliage as dry as possible. Clean, acidic water is important rather than using tap water. Place the young seedlings into multi-trays with the deeper plugs and where each plant is in its own plug that is separate from the other plants in case of soil infection. The plugs provide a smaller, tapered rooting body into which the roots can develop and are air pruned when they emerge out the base. At this stage pot on to the next larger container. It is important to monitor your plants daily to see if they need watering and for problems. Dying back of the tips of the leaves is an indication of possible fungal infection due to high humidity and wet leaves or problems in the soil such as too wet or incorrect pH or nutrient levels. Only water when needed, do not overwater. Watering is very difficult to explain as it depends upon conditions in each growing condition, nature of the potting media, drainage, etc. Allow the plant media to dry a bit between watering and then water well when this is done so the medium is properly wet as this ensures proper water penetration of the entire medium and encourages the roots to grow down rather than up to wards the surface which happens with superficial watering.
Transplanting
As soon as the first true leaves appear, transplant the seedlings into 1 litre bags or pots containing the same soil as above. Choose a cool day or late afternoon to minimise heat stress. Water immediately after transplanting. The seedlings should then be planted out into their permanent position within 6 months.
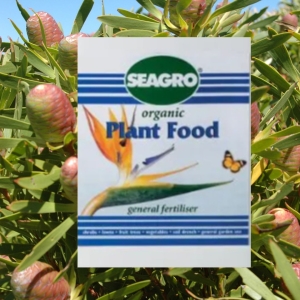
DO NOT use fertilizer or manure, as the surface root system of the plants will be burned. If you want to feed the plants, use an organic plant food such as a fish or seaweed emulsion. For the commercial production of Proteas, there are some suitable low phosphate slow release fertilizers available.
Mulching with well-rotted compost or wood chips helps keep down the weeds, retain moisture, cool the roots and supply some nutrients. DO NOT dig or cultivate around the plants the fine surface root system will be disturbed, and the plants may die. Weeds should be pulled out or cut.
Leaf Chlorosis – Compiled by Odette Weedon and Eugenie-Lien Louw, with special thanks to Louise Nurrish
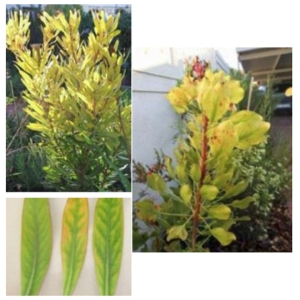
A deficiency in the soil is rare but iron can be unavailable for absorption if soil pH is not between about 5 and 6.5. Common problems are high soil alkalinity (the pH is above 6.5), the soil has a high clay content, is compacted or overly wet. High levels of phosphorus in the soil can also cause iron deficiency. The most obvious symptom of iron deficiency in plants is commonly called leaf chlorosis. Iron is needed to produce chlorophyll, hence its deficiency causes chlorosis. This is where the leaves of the plant turn yellow, but the veins of the leaves stay green. Typically, leaf chlorosis will start at the tips of new growth in the plant and will eventually work its way to older leaves on the plant as the deficiency gets worse. Any plant may be affected, but mainly acid-loving plants such as fynbos, azaleas, hydrangeas and camellias.
and treatment to fix:
Iron Fertilizers – Wonder Ferrofood granules (Efekto)
Apply once or twice to rectify according to lowest recommended application rate.
Iron can be applied as iron sulphate or in a chelated form
5 ml Iron sulphate (FeSO4) dissolved in 1 L water OR 5 ml Iron chelate (Fe EDTA) dissolved in 1 L water, enough for 1m2.